Wednesday, December 2, 2015

My Keyhole Garden


Now that the harvest is over and Thanksgiving has come and gone, I want to report on the results of my “keyhole” garden experiment.  The idea for this project came from the book, Gaia’s Garden: A Guide to Home-Scale Permaculture by Toby Hemenway.  We’re interested in applying permaculture concepts to our land and gardens and we’ve already started to implement some of the practices over the past year, such as chop-and-drop mulching, rainwater conservation, and beginning to plan for layers, guilds, and zones.  It will be a multi-year process, like all gardening endeavors!  This Spring, I had a brand new garden bed and I was excited to try out the concept of a keyhole garden.

What’s a Keyhole Garden?

Image credit:
http://southwoodsforestgardens.blogspot.com/
Keyhole gardens are raised bed gardens laid out in a shape reminiscent of a keyhole—a semi-circle or horse shoe shaped bed with a deep notch or central path extending into the garden’s center.  The design allows gardeners to grow more in a smaller space and to irrigate more efficiently.

Often in a conventional garden, plants are in rows, alternating with walking paths; with a keyhole design, gardeners can access plants from the central notch or path and also from the outside of the garden bed.  Fewer paths also means more growing area and soil that is less compacted, which is particularly important in permaculture because it emphasizes a no-dig method of gardening.

A keyhole garden may be watered with just one sprinkler placed in the center of the bed.  The shape of a keyhole garden can also be used to “catch” sun.  With the path or notch oriented toward the South, the “U” shape of the bed captures and holds sunlight.  This effect can be enhanced by planting taller vegetables in the back of the bed, trapping light and sun in the garden and also providing a windbreak.

My Own Keyhole Garden Design

Although my new garden bed is square, it was the right size for making use of the keyhole principal.  In keeping with the no-dig method, we prepared the bed a few weeks in advance by laying cardboard sheets over the soil to block sunlight, killing the grass and weeds. Tarps went on top of the cardboard, held down with rocks. Early in May, we removed the tarps and broke up the cardboard into smaller pieces for composting in the soil.  My brother-in-law provided us with a truckload of excellent composted manure so which gave us a few inches rich, moist soil from the start. 


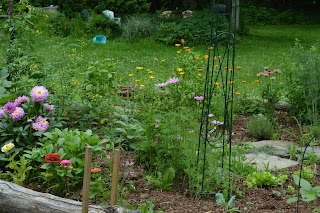
My keyhole garden in the morning sun.  

First, I did a sketch of the garden and then we laid out the central path with large flat stones. I chose to make the garden entrance where it provided easiest access but also in accord with access to sunlight on our property.  Our path begins at the Eastern corner of the bed and extend diagonally to the center.  This alignment worked best for us in terms of access from the house, and also because we have tall trees that block much of the sun to the South.  Morning sunlight is drawn down the path toward the western edge and held there through mid-afternoon when the sun slips behind the trees.

Side view of the garden in July
I wanted this bed to be a kitchen garden—an informal mixture of small veggies, herbs, and annual flowers.  I lined both sides of the central path with my favorite cooking herbs.  Lettuce and cilantro grew at the top of path and in a spot where I could plant a second crop in mid-summer.  Behind the culinary herbs, I placed medicinal herbs like borage, calendula, and lemon balm. Plants that climb and sprawl went in the corners (Golden Sun cherry tomato, cucumbers, and Delicata squash) where they would be free to spill over the edges of the garden.  I also found a spot for alpine strawberries along one edge. Finally, I interwove some of my favorite flowers—sweetpeas, cosmos, dahlias, and zinnias. 

I found that the keyhole design, allowing me access plants from outside and from the center, made it easier for me to stay on top of dead-heading, harvesting and pest patrol.  Almost everything I planted was a success (except for a wormy cabbage that had to be pulled) but it also brought me so much joy.  I harvested many wonderful salads and used herbs in new ways, both culinary and medicinal.  I’ve never grown calendula before but I fell in love with that plant.  I put calendula flowers in my salads and harvested some to dry, but most of all, I simply enjoyed looking at its cheery golden glow in the garden every single day. 

Keyhole Gardens in Arid Regions

My delicata squash plants, beginning to spill over the edge.
It’s rather interesting to know that keyhole beds were originally designed by charitable organizations as a means of allowing people in arid or drought-stricken regions the means to raise food for their families; a number of organizations are promoting and implementing keyhole gardens in Africa.  Since creating my own bed, I’ve learned that the center of a keyhole bed sometimes contains a compost bin constructed out of chicken wire.  Nutrients from the central compost bin slowly leach into the garden, steadily improving soil.   Rain water and gray water added to the compost also helps irritate the garden.  It’s a great idea but it wasn’t mentioned in Gaia’s Garden so I didn’t implement it in my initial design.  It’s something I would like to experiment with in the future, although it seems to be favored mostly by gardeners in climates with longer, hotter growing seasons.  Living in a cold climate, I am concerned about whether my compost would decompose quickly or thoroughly enough.  It could be pretty unpleasant if the compost was unsuccessful, so I will need to think more about this before implementing.  However, keyhole gardening could be an excellent choice for areas that are struggling with drought conditions.  This site has some excellent photos and diagrams of keyhole gardens in Africa and North America:  http://www.inspirationgreen.com/keyhole-gardens.html


Monday, August 3, 2015

Gardening Experiments

How does our garden grow? With science!

sweet potato in a glass of waterOur neighbor friends went on vacation and found three sweet potatoes they left behind. Rather than throw them out, they decided to do some experimenting and put them in water. Friend gave one to Husband and they kept the other two. The neighbors don't really have a deer-free zone to plant in, but the potato (probably actually a yam, but work with me here) looked like it needed somewhere other than a glass of water to live in. Husband introduced it to me by asking if I'd met "Sweet" yet. We haven't decided where to plant it. We have the two aforementioned gardens now and the red potatoes are out front. It looks hearty enough to plant and I'm sure it will be delicious. There are actually lists out there of all the food you can regrow from stubs, like carrots. We have found that unless they are organic, peppers and similar do not grow. It's probably not in the companies' best interest to have plants people can grow themselves. For "Sweet" I sent Husband the instructions here: http://wakeup-world.com/2012/10/15/16-foods-thatll-re-grow-from-kitchen-scraps/ This is not the longest list available. Google the topic for other lists, but they mostly include leafy greens and potatoes.

This morning Husband asked if I knew what the large plant in the middle of his front garden was. Turns out two of our sunflowers are finally growing. One is growing VERY well and one is kind of just holding its own. We had three varieties of seeds between a storytime craft program and from Kiddo's class at school. I think I killed some of the seedlings when I planted them so I'm happy that any of the five or six made it this far. Before the storytime program, I actually had no idea how many varieties of sunflower there were, so it will be interesting to find out which ones survived.

We also never got around to planting the volunteer lettuce/endive that we stuck in a container in the window. Did you know that lettuce flowers? After a point, the lettuce put up a long stalk and purple flowers appeared along it. Not sure if it's going to flower forever or not. It's not something I expected to see.The extra stalk is more than a foot long. We just keep watering it, to see what the plant will do. The other variety of lettuce (not entirely sure what - a green leaf variety) is not doing anything so interesting.

The back garden has given us lettuce (til the heat wilts it), basil, beans, peas and tomatoes. Most of the tomatoes are still green, but a couple of years ago we started eating fried green tomatoes and I found I love them. Husband also goes out early in the morning to collect squash blossoms. He keeps them in a container in the fridge til he has enough to cook and then he cooks them much the same as the fried tomatoes. We hardly ever get squash (no idea why) so he figures the flowers are his only harvest from a plant that otherwise takes up a lot of room. It's been a few years since he actually planted one - they just volunteer. So we eat them.

Overall our gardens are still very much a work in progress but we enjoy whatever we get from them. With a side of science!

Thursday, July 16, 2015

Garlic and Garlic Scape Pesto

Garlic is one of the vegetables we are growing for the first time this year.  We cook with garlic frequently and also like to grow crops that we can share or give as gifts.  Garlic must be planted in the Fall for the biggest heads and highest yield in the following summer and that was also appealing to us.  We moved on to our property in mid-August as the growing season was winding down, but we were itching to get started on creating our homestead and planting some garlic was an easy project to get us started.

Hardneck and Softneck
Garlic varieties are classified as either softneck or hardneck.  Softneck is what is commonly sold in supermarkets and, according to Boundary Garlic Farm in British Columbia, the reason it's the main variety we see at the store is that softneck garlic can be planted mechanically.  Softneck varieties store better and the flexibility of the garlic "neck" allows for braiding.

Hardneck garlic varieties require more precise planting because it will not grow unless the the top of the clove is pointing up.  Compared to softneck varieties, hardneck garlics have larger cloves with more complex flavors, and are easier to peel.  Hardnecks are also the best choice for growing in cold climates like the one I live in.

We purchased our organic seed garlic at the Gardeners Supply store, where we had a choice of several heirloom varieties, including some that had soft purple stripes, a pink tinge, or a creamy white skin.  Their flavors were described with terms like "rich," "mild," "spicy," or "hot."   We bought a couple of heads of two different hardneck varieties, Porcelain and Rocombole, and planted the individual cloves in a corner of the garden last October. To help them through the winter, we added a layer of leaf mulch.

It was a long winter with the most prolonged spells of deep cold I can ever recall.  I worried about all our new plantings, including the garlic bulbs under their bed of leaves.  In late Spring, we removed the mulch and were happy to find the green shoots of a dozen garlic plants already sprouting. By early June, they were well ahead of everything else in the garden, even the weeds!

Garlic Scapes

One of the special qualities of hardneck garlic is that it produces a long, edible flower stalk commonly known as a scape.  Scapes are becoming popular in restaurants and with home cooks, along with other early season wild and specialty foods such as ramps and fiddleheads. Scapes are firm and curly; I've seen some that have curled into complete circles but ours simply drooped gracefully.

Younger scapes are more tender and have a milder flavor.  I decided to harvest mine fairly early because we were moving into the warmest temperatures of the season and I wanted to use them raw to make pesto.  I simply snipped them from the stalk at the point where they still felt soft and flexible, much like picking asparagus.

Garlic Scape Pesto

Scapes are a versatile vegetable and the young tender ones can be chopped and added to salads or other dishes.  They are also good steamed, grilled, or sauteed in a little oil.  If they are older or slightly tough, scapes can be peeled and blanched to improve texture.  Garlic scape pesto seems to be the most popular use and I was excited to try making it.  My basil plants are beginning to flower so I was happy to find a recipe on Serious Eats by blogger Crisper Whisperer that suggested using a mixture of basil and garlic scapes. 

The recipe will be familiar to anyone who has made pesto.  If you haven't made pesto, it's very easy, stores well in the fridge, and can even be frozen.  Typically, pesto uses pine nuts but a blight combined with harsh weather in Italy has led to a shortage as well as higher prices over the past few years.  Many cooks are substituting walnuts, almonds, or sunflower seeds and finding them just as satisfactory and more economical.   


My garlic scape pesto came out paler in color than traditional pesto but had a big, garlicky flavor that we loved.  It was so delicious I had to force myself to save some for leftovers!  I used only half of my garlic scapes to make this pesto, and have saved the other half to make a white bean garlic scape dip for a dinner party this weekend.  

Removing the scape not only provides a delicious vegetable, it allows the plant's energy to go into forming a larger garlic bulb for harvest.  Some growers also say that removing the stalk improves its storability.  Scapes that are not removed eventually mature and form an umbel shaped cluster of tiny garlic bulbils.  Bulbils can be used to start new garlic plants but take at least two years to form a bulb large enough for harvest.  

Tuesday, June 2, 2015

Neighborhood birds bring me closer to nature

Western tanager, one of my new sightings this year
(Photo credit: fotolia, julielubick)


I have always loved birds, but I would not have considered myself a birder until recently. Now, birds are one of my strongest links to the natural world.

As a kid, I had parakeets (Pepper, Penny and Powder – my young writer self loved alliteration), and I enjoyed watching the sparrows who would nest in the trees outside my bedroom window. I tried to lasso starlings with my jump rope, and I built birds' nests out of grass clippings, hoping a bird would take up residence in them.

Despite my young fascination with feathered creatures, I really didn't start paying attention to the sheer diversity of bird species until my husband and I moved to our current neighborhood four years ago. We live in a suburb of Denver, Colorado, that is nestled between the foothills of the Rocky Mountains and the plains. Our neighborhood also happens to be along a migration path for several species, so we are lucky enough to see some birds that others in our area don't often see. 

You might be surprised to learn that the suburbs are often home to the widest variety of bird species, as documented last year in this NPR story, which attributes that phenomenon to attractive backyard habitats and food sources for birds.
Western kingbird
(Photo credit: fotolia, spatesphoto)

So, when I made the decision to start paying attention to the birds more closely, I started to notice birds beyond the ever-present sparrows and robins. On my daily walks with my dog, which cover 2-4 miles depending on the route, I began to look for new birds. The more I looked, the more I found.

I also started to notice patterns, and now I anticipate the arrival each spring of a large migrating flock of robins (50+ in this group), as well as the bullock's orioles and western kingbirds who always seem to arrive last in the spring.

Most importantly for me, this practice helped me slow down, listen and be aware of my surroundings. It is a quiet sort of meditation for me to walk in the fresh air and sunshine  and it helps me feel more human.

You don't have to go to the country or the wilderness to experience nature (although, of course, I love a good hike in the mountains). In my suburban area, from neighbors' backyard landscapes to the grasses and shrubs of the parks and open space, nature is present and it thrives. Urban dwellers can also tap into the natural world by making use of city parks and trails.

Great blue heron (Photo credit:
fotolia, donyanedomam)
Year-to-date, I have counted 42 different bird species in my neighborhood alone. Some of the more exciting sightings for me have been an adolescent bald eagle circling high above our park, a great blue heron flying past our area (we don't have water in our neighborhood, so it wouldn't roost here) and a new-to-me sighting of a western tanager, but I love and appreciate each an every bird I see.


To learn more about identifying birds in your area, one excellent resource is the Cornell Lab of Ornithology. You can use its tools to ID birds, or you can be a virtual birder as you watch owls, osprey, hawks and more on the Cornell bird cams. 


Thursday, May 28, 2015

Children's Book Review: How Groundhog's Garden Grew

My daughter, the wanna be farmer, is also very into...everything. She wants to know how the world works. To that end, she has eleventybillion books. I thought it would be fun to go through a few to give you our green thumbs up or down on a few kids' books.

Today's will be How Groundhog's Garden Grew, by Lynne Cherry.


This is a delightful book about a little groundhog that gets caught eating everybody else's hard work. Squirrel tells him to stop stealing food from others and instead of just chastising him, sets about teaching Little Groundhog how to create and tend his own garden. Squirrel teaches Little Groundhog how to select seeds, how to cut sprouting potatoes, and even what to do when the bounty is too much for Squirrel and Little Groundhog to eat themselves.

I liked this book in part because it's a delightful little story for children (and wonderfully illustrated) but everything in it is real guidance. You and your child could follow Squirrel's advice for a real garden of your own. The book even talks about things like thinning seedlings and beneficial bugs. Little Groundhog's delight in new vegetables might encourage your "little groundhog" to try a few new veggies him/herself.

We give this a green thumb's up.

Thursday, April 30, 2015

Flushable in Name Only

I'm sure many parents are like us. When your child finally gets to the age where they can use a toilet by themselves, you do your own kind of Potty Dance. Unfortunately it takes a while for true self-sufficiency. When "flushable wipes" came along, we bought them. We bought a lot of them. They seemed to be the answer between wads of toilet paper and a stinky 3 yr old. They were even easier for our child, and wonderful for camping. Big name toilet paper companies even started making some aimed at adults, and there were similar products in the feminine hygiene aisle. Wipes for everyone!

Unfortunately, the marketing was a bit misleading. They have become the bane of water treatment plants. They'll flush and not back up your pipes, but that's the end of the truth in advertising. The issue starts when they leave your house. When I realized they were such a problem, we stopped flushing them and then stopped using them altogether. The companies that make the wipes blame the consumers, saying that people are flushing regular baby wipes and not just the wipes that are intended to be flushed. While I don't doubt intelligence is a bell curve, I find it hard to believe that it's all baby wipes.

I ran across this video that illustrates the enormity of the problem. This is just one treatment plant in New York City. It's disgusting. It also makes me think what other products are causing problems I don't see because I'm blessed to live where my trash gets picked up in blue trucks and I never see it again. In this case, good old toilet paper is the way to go (no puns intended) because it breaks up and it's biodegradable. It's a natural product, unlike the plastics used in wipes. It doesn't end up in huge bins, being trucked to landfills.

Moms and dads - I hear you. Those wipes are calling your name. Just don't flush them. Or, consider a moist paper towel if your kid needs a little help. Think of the poor guy in the Bronx whose job is to use a rake to get them out of the treatment plant. Ew....

Tuesday, April 21, 2015

Dear Garden, I'm sorry. Love, Bitsy

I’m going to be completely honest and admit that I’ve let my  vegetable garden go to hell.  I’ve spent the majority of the past three years pregnant or dealing with a newborn and neglected it horribly.  This year I am determined to reclaim it and give it the love and attention it desperately needs.  Where I live I get six months of winter and two months of the other seasons if I’m lucky. The year I tried to establish my raised beds we had a long spring with two weeks of summer and an early fall. Everything rotted where it grew because it never got hot and dried out. Thankfully this year seems to be following the usual pattern. I was able to start my bed prep in April like I prefer.  I did most of it in a single afternoon with help from my husband and a good friend.  

The first thing was to rake out all the dead and pull anything left to winter over.  I had left all my roots in to winter over and thought I would find quite a few things nicely preserved under the freshly thawed surface.  I found six partially eaten carrots.  Unbeknownst to me a rabbit had gotten inside the fence and made herself quite a nest between two of my raised beds.  She lived high on the hog all winter off my veggies protected from predators by my fence.  The hole she was using to get in and out has since been mended.  

Raking the debris was fairly straight forward.  Since I neglected my beds I had disease issues last year so instead of composting the leaves and dead plants like I would normally recommend doing my husband and I burned them on our dirty burn pile.  Then I had him and one of our friends use a weed torch and burn off the surface of all the beds to kill any remaining disease causing microbes and germs before they were turned into the soil to wreck havoc with this year’s crop.  My husband loves any excuse to get the weed torch out so it was not hard to get him to help at all.  

Turning beds is very hard for me.  Last year my husband bought me a two handled broad fork to use.  He had seen one when we went to the Mother Earth News Fair in PA the fall before and felt it would be big help.  He was right, the broad fork allows me to use my body weight to turn the ground as opposed to relying on strength and stamina both of which I struggle with.  With a broad fork I just have to step up on to it and rock back, the tool does the rest of the work.  It did not take the 3 of us long to get the six big raised beds and four small ones turned like this.   

After the beds were turned I had the guys burn the beds again.  This time they were going after old root material and the worst thing that has resulted from my neglect, an infestation of  Japanese Beetle grubs.  I hate Japanese Beetles.  As grubs they destroy the roots of plants and any root vegetables.  Once they become adults they feed on the leaves and fruit of the plants and can kill full grown hardwood trees if there are enough of them.  They are also highly annoying buzzing around crashing into everything including windows, the dog, cars and people.  They seem especially adept at locating and bouncing off my glasses and falling in my drink. Only mine, never my husbands or one of the kids.  It has to be personal. They are huge pests and a big problem.  Burning the larvae and eggs in the soil is a big step towards reducing their numbers this year.  I have other organic pest control methods I’m going to implement as the season progresses but this was attack one in my war against them.  

Here is another confession:  I haven’t amended my raised beds in years.  I knew that I would have  to do that this spring and shopped around for organic solutions. I found a four part system from Arbico organics that I decided to try out.  It’s called Bob and John’s soil prep kit.  It promises not to burn any existing plants and is all natural.  I bought the small kit because I don’t have a great deal of soil to cover.  I found it very easy to use and I am optimistic about the results.  The first three parts were easy enough to broadcast by hand and the last just required a hose sprayer.  No complicated mixing and measuring just toss it, spray it, and water it in.  The forecast is  calling for three days of rain which should help the amendments work their way in nicely before I put any seeds or plants in.  


That is how I spent my Sunday.  Hopefully It was a big step towards reclaiming my vegetable patch and undoing the damage caused by neglect.  Maybe my poor garden will even forgive me and I’ll get a decent crop this year. 


Monday, April 20, 2015

Suburban Gardening, Metro DC style


A few weeks back, we got a freak snowstorm here, and now it is bright and sunny and about 47F, which to my husband means t-shirt weather. Welcome to springtime in DC.
We are suburban gardeners. (I use the royal We here, as it is mostly him.) Several years ago, he and a friend built a raised garden bed in the low point of the backyard, where it was spongy anyway, and he covered it with chicken wire above and below to keep out the deer and rabbits. That is where we contain most of our gardening. Leaving it open would just be a deer snack bar. The garden in back in mostly squash, tomatoes of all kinds, beans, lettuce and basil.

Last year, Husband dumped some of our compost into the front yard, in a sunny spot between the azaleas, where I hadn’t managed to keep a flower garden growing. Our 6 yr old is the co-gardener and on this day, she is supervising the building of  new beds in the front yard. Part of the prep has been to take old wood from a previous project, and make about a 5ft by 2ft box and a smaller 3ft x 16 in box for the plants. The boxes were filled with compost from our backyard tumbler and old leaves. He ran drip lines from the rain barrels. The rest will have to wait for a trip to a nursery for seeds, unless we get more volunteer plants. One of the benefits of composting is that you sometimes get more of what you already eat when seeds survive in the compost. We would love to have the room to do what Sara does but that will take more land and probably fewer deer.

Kiddo wants to be a farmer. She's gardened with her dad since she could toddle up to the side of the garden bed and eat the basil straight off the plant. I enjoy watching them do "their thing". It brings back memories of my own childhood when my mother had a garden behind our garage. I also think it is good for kids to see food, to watch it grow from seeds or sprouts, and care about the soil. My role is pretty much to eat All The Things. Tomato sandwiches, anyone? Hopefully in a few weeks I can update with how our garden grows.

Tuesday, April 14, 2015

Corralling my Compostables


(Or more honestly, ‘Tidying that Garden $h!t Up’)


In between random downpours and snow flurries, and when the temperature gets up above 5C, I have been engaging in ‘productive procrastination’ in the garden.  Weeding – yup, love that one. Cutting odd stuff with secateurs – yup, love that one too. Rounding up all the branches, sticks and twigs that were either lopped last October and have been hidden under snow for 6 months, or have dropped off my trees due to weight of said snow – yeah, not so much. But with the weather limiting my options for more exciting things like pouring the concrete foundations of my new tool-shed, or ripping the roof off an old outbuilding, tidying that $h!t up is about as good as it has got recently.


Wood, wood & more wood


With a hungry wood burning stove that powers my homes’ central heating, you’d think I’d be revelling in so much free fuel, right? Well the OCD freak in me has of course devised a system for dealing with all this – as thick as a finger gets stripped, cut and bagged for kindling (8 sacks and counting), 1-2 inches thick gets stood up to dry (if it’s straight it’ll become tomato canes, otherwise it’s bigger kindling), and fat branches or trunks get stacked for burning. But the whole twiggy mess of a snail trail this has been leaving behind, Hmmm. Compost heap?


As you can see, my main heap didn’t fair too well over winter (build new heap already added to ‘must do’ list) and with my gut instinct telling me that adding a pile of twigs twice its size probably wouldn’t help it along, I researched alternative uses for my twigs (oh yes, that’s another top productive procrastination tool for indoor days when I should really be cleaning or building my kitchen). And then I found the mother of all valid excuses to dump that wood in a single place and call it meaningful – Hugelkultur.


Literally meaning ‘hill culture’, Hugelkultur is basically creating mounded raised gardening beds starting with a base of decomposing wood. YAY! As I am already growing in raised beds using the ‘lasagne’ method of building my soil, Hugelkultur seems not that much of a stretch. To boot, I also happened to have the perfect spot for my new bed - a long south facing trench behind my big barn that wasn’t doing much other than getting waterlogged every time it rained. Talk about serendipity!


I’m currently about half way through clearing the myriad piles of wood in the garden but so far my new Hugelkultur bed is looking pretty good …OK, maybe not good but it looks intentional at least. Once I’m done with the woody layer, I’m supposed to cover it with layers of composty stuff but as the contents of my existing compost heaps are bound for my current raised beds, I’m thinking it might have to be some concoction of cardboard, ground cover moss, chicken coop cleanings out, and grass clippings (the latter two begged from a friend in the village). Er – sounds just like a new compost heap to me. Oh well, if it gives me some place new to compost while I empty and rebuild my other heap, that’s great.


**There is a science to Hugelkultur BTW. If you want to know more, Permaculture magazine has a great intro HERE

Saturday, April 11, 2015

Our First Sugaring Season


Late winter is maple sugaring time. In the woods all over Vermont, blue plastic tubing zigzags through the trees, directing gallons of sweet, clear sap from taps to collection tanks. At twilight, steam rolls out the tops of sugar houses where the wood-fired evaporators are boiling down the day’s run into sweet, dark syrup. It’s our first winter here on our new property, an 1836 farmhouse with almost 3.5 acres. Starting a maple sugaring operation was one of our major goals for this year and since J grew up sugaring with his family, he was eager to jump into the process.

As the season winds down, we’ve collected around 500 gallons of sap from fifty maple trees on our property. Preparation started in the Fall, marking the largest maples with bright tape so we could easily identify them during winter when they are without leaves. After Christmas, we purchased and prepared the equipment-- taps, tubing, connectors, and collection tanks--and began setting up the lines. People who sugar as a business increasingly use vacuum pumps to extract the sap and propel it efficiently toward the collection sites, and then reverse osmosis to remove the water from the sap and speed up boiling time. But this is a small scale family hobby for us so we are keeping it old-school and inexpensive. We even used metal buckets on a few trees where tubing didn’t make sense. Buckets are more labor intensive but they certainly have a nostalgic charm to people who grew up around maple sugaring. 


It takes about 40 gallons of sap to make a gallon of syrup and the success of any year’s crop is highly dependent upon weather conditions. Warm days and cool nights are the best combination and typically the sap does not begin running until late February or early March. An exceptionally cold winter this year delayed the season a couple of weeks. It’s the second week of April and we have been collecting thirty to sixty gallons of sap a day. J’s brother boils it down nightly in his sugar house and has made 28 gallons of syrup from sap collected on three different properties. As daytime temperatures begin to reach the 50s, the season is winding down. Eventually the sap turns yellowish and less sweet, a sign that the tree is turning its energy into new leaves and sugaring is over for another year.